How to Install EPDM Rubber Roofing?
If you’re looking for a durable, waterproof, and cost-effective roofing, then the EPDM Rubber Roofing is an amazing choice. It’s a popular material for flat and low-slope roofs due to its easy installation process and longer lifespan, which is upto 30 years. So, in this article, we’ll guide you through the step-by-step process of how to install EPDM rubber roofing, to make sure it looks professionally done.
Why Should You Choose EPDM Rubber Roofing?
One of the biggest advantages of this EPDM roof is its long lifespan. With proper care and maintenance, they can last between 30 to 50 years, which makes them a durable option for homes and buildings.
EPDM roofing is also highly resistant to different weather conditions. It can handle extreme temperatures, strong UV radiations from the sun, and heavy rainfall without getting damaged. Unlike some other roofing materials, it does not crack or weaken easily over time.
It can expand and contract with changes in temperature, which helps to prevent cracks and leaks. This makes it a reliable roofing option, especially in places where the weather changes frequently.
Moreover, the best reason to choose EPDM roofing is its affordability. It is a cost-effective option compared to many traditional roofing materials. The installation process is also simple, which helps save on labour costs. Because of its durability and low maintenance needs, this roof is a smart and budget-friendly choice for both residential and commercial buildings.

Safety Precautions For Installing the EPDM Rubber Roof
Before starting the installation, it is important to follow safety guidelines to prevent accidents and ensure a smooth process.
- Make sure to wear the right protective gear, such as gloves, safety glasses, and non-slip shoes, to protect yourself from injuries. If you are working on a high or sloped surface, use a secure ladder and make sure it is placed on stable ground. It is best to have someone assist you when working at heights.
- Check the weather conditions before installation. Avoid working in strong winds, rain, or extremely hot weather, as this can make the installation process unsafe and affect the adhesive’s effectiveness.
- Be careful when handling sharp tools like utility knives and scissors while cutting the EPDM membrane. Always cut away from your body and keep your fingers clear of the blade.
- If you are using adhesives or primers, make sure to work in a well-ventilated area to avoid inhaling fumes. Some adhesives can be flammable, so keep them away from open flames or high heat sources.
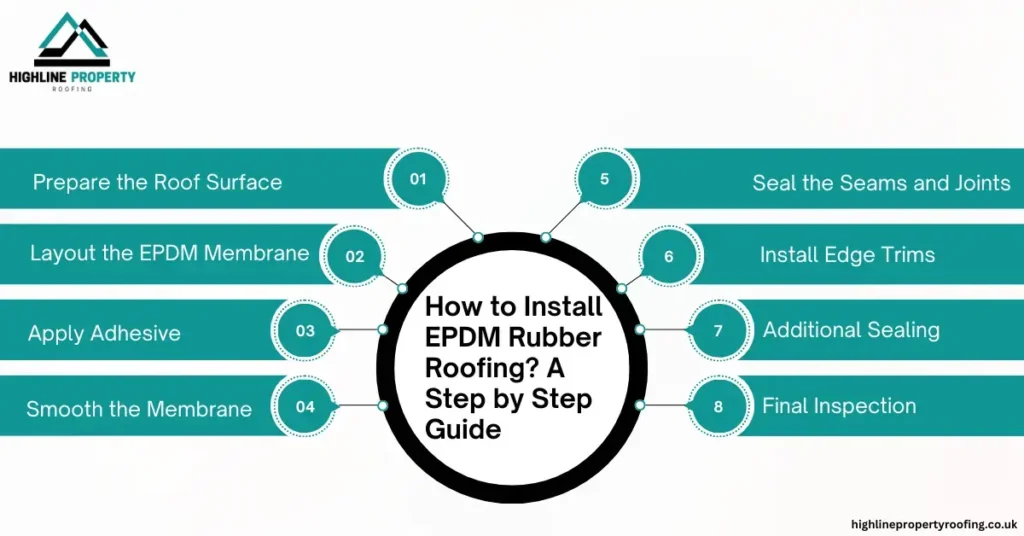
How to Install EPDM Rubber Roofing? A Step by Step Guide
Installing EPDM rubber roofing is a reliable way to protect flat or low-slope roofs from water damage and harsh weather. It is durable, flexible, and long-lasting when installed correctly. Here is a detailed guide on how to install EPDM roofing properly.
Tools and Materials Needed
Materials:
- EPDM Rubber Membrane
- Water-Based Adhesive
- Contact Adhesive
- Seam Primer & Seam Tape
- Edge Trims & Fixings
- Wood Battens (if additional support is needed)
- Silicone Sealant
Tools:
- Measuring Tape & Chalk Line
- Rollers & Paint Brushes
- Knife & Scissors
- Broom & Cleaning Cloth
- Caulking Gun (for applying sealant)
- Pressure Roller
1- Prepare the Roof Surface
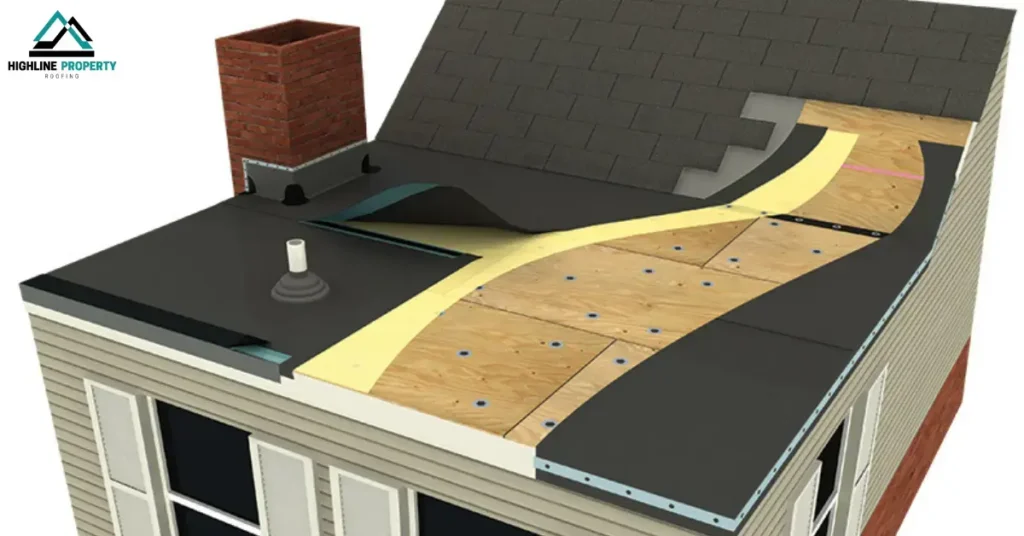
The first step is to prepare the roof surface. Start by cleaning the entire area where the EPDM membrane will be placed. Remove any dirt, dust, or debris to ensure a smooth surface. If there are any old roofing materials, they should be completely removed.
The roof surface should be dry before installation to help the adhesive bond properly. If the roof is uneven or rough, consider adding a layer of plywood or insulation boards to create a solid, even base for the membrane.
2- Layout the EPDM Membrane
Once the roof is prepared, the next step is to lay out the EPDM rubber sheet. Carefully unroll the rubber sheet over the roof and let it rest for about 30 to 60 minutes. This allows the material to relax and remove any creases or folds caused during packaging. Make sure the edges extend at least 50mm (2 inches) beyond the roof so you can trim them later. Fold back one half of the sheet to get it ready for the adhesive.
3- Apply Adhesive
After positioning the membrane, fold back one half of it to expose the roof surface underneath. Start by choosing the right type of adhesive. Water-based adhesive is ideal for large flat areas, while contact adhesive is better for edges, upstands, and vertical surfaces. Apply a special bonding adhesive evenly over the roof deck and also on the back of the EPDM sheet.
Make sure to spread the adhesive smoothly using a roller or brush to prevent lumps and uneven adhesion. Allow the adhesive to become tacky, which usually takes a few minutes, before carefully rolling the EPDM membrane back into place. Repeat this process for the other half of the membrane, ensuring full coverage.
4- Smooth the Membrane
Once the membrane is in place, smooth it out using a broom or a heavy roller to remove air bubbles and ensure strong contact with the adhesive. Start from the center and work towards the edges to prevent trapped air. Any remaining wrinkles should be carefully pressed out to create a flat, secure bond.
5- Seal the Seams and Joints
If your roof needs more than one EPDM sheet, seal the seams and joints properly. Overlap the sheets by at least 75mm (3 inches) and clean the overlapping areas with a seam primer. Apply seam tape to create a waterproof seal, then press it down firmly using a pressure roller to remove any air pockets.
6- Install Edge Trims
Once the membrane is in place, install edge trims and flashing to keep everything secure. The edges and seams of the membrane must be sealed properly to prevent water leaks. Trim any excess EPDM material along the edges with a sharp knife, making sure the cuts are neat and precise. For upstands and corners, use pre-formed flashing to prevent leaks. Apply a silicone sealant around trims and roof penetrations for extra protection.
7- Additional Sealing
Additional sealing is necessary around any roof openings such as vents, chimneys, skylights, or drains. Apply rubber sealant or flashing tape around these areas to create a waterproof barrier. This step is important to prevent leaks, especially in places where water tends to collect.
8- Final Inspection
Before considering the job complete, inspect the entire roof thoroughly. Check for any loose sections, bubbles, or wrinkles, and press them down firmly to secure them. Make sure the adhesive has bonded properly and that all seams and edges are tightly sealed. Allow the adhesive to cure completely, which may take several hours, before walking on the roof or placing any heavy objects on it.
With proper installation, EPDM rubber roofing can last over 30 years, providing excellent protection against rain, wind, and temperature changes. Regular maintenance, such as clearing debris and checking for any damage, can help extend its lifespan and keep it in good condition.
How Much Does EPDM Rubber Roofing Cost?
The EPDM rubber roofing cost depends on various factors, such as the size of the roof, thickness of the membrane, and installation method. The average cost includes:
| Material/Service | Cost Range |
| Basic EPDM Materials | £50 to £80 per m² |
| Labour Costs | £25 to £45 per m² |
| Average Cost | £80 per m² |
The Average cost of installing an EPDM roof on a single garage costs you around £1000 to £1500, but the price vary and depends on the size of the roof and location.
Case Study
Recently, our roofers installed an EPDM rubber roof for a homeowner in Brighton, UK. The client had been facing ongoing leaks and damage with their old felt roof, which was no longer providing proper protection.
After inspecting the roof, our team recommended a high-quality 1.5mm EPDM membrane due to its durability, waterproofing ability, and long lifespan. The total roof area was 50m², and we completed the installation within two days using water-based adhesive, seam tape, and edge trims to ensure a secure and professional finish.
The project, including both labour and materials, cost approximately £3,500. The homeowner was extremely pleased with the results, knowing that their new EPDM rubber roof would provide at least 30 years of protection with minimal maintenance.
Conclusion
EPDM rubber roofing is a durable, cost-effective, and long-lasting solution for flat roof and low-slope roofs. When you installed it correctly, it provides excellent protection against harsh weather, UV exposure, and water damage. By following these proper installation steps, you can ensure a strong and professional finish. Taking the time to install it properly will maximise its lifespan and performance, saving you money on roof repairs and maintenance in the long run.
FAQs
How long does it take to install EPDM rubber roofing?
A standard EPDM roof installation takes 1-2 days, depending on the roof size and complexity of the roof.
Is EPDM roofing suitable for all climates?
Yes, EPDM roofing is resistant to extreme temperatures, UV rays, and heavy rain, but with proper maintenance.
How often does EPDM rubber roofing need maintenance?
You should do roofing maintenance once a year, if you are already doing minor maintenance regularly.