How to Install Fascia Board and Soffit?

Installing fascia board and soffit is an important part of maintaining the roofline of your home. Proper installation of these boards protects your home from water damage and gives your roofline a clean, polished look.
We’ve worked on many houses where small issues with fascia and soffit can cause major problems like water damage, leaks, or poor ventilation. That’s why it’s important to get the installation right, whether replacing damaged sections or installing them for the first time, with the help of this detailed guide, How to Install Fascia Board and Soffit and protect your home.
Tools and Materials You’ll Need
To install fascia board and soffit, you’ll need:
- Measuring tape
- Hammer or nail gun
- Saw (hand saw or circular saw)
- Drill and screws
- Ladder or scaffold
- Safety gloves and glasses
- Wood primer and paint (if using wood)
- New fascia and soffit boards (usually wood, PVC, or composite)
How to Install Fascia Board and Soffit by Yourself? Step-by-Step
Fascia and soffit boards protect your roof and keep your home looking finished and clean. If you’ve never done it, you can easily install them by following these simple steps.
Step 1: Prepare the Roofline
Before starting, make sure your roof edge is clean and safe to work on. Remove any broken, loose, or rotted fascia board and soffit. Also, clean away dirt, leaves, or nests stuck in the corners.
Once everything is clear, take a good look at the roof rafters (the wooden beams that stick out under the roof). If any of them are soft or broken, replace them before installing anything new. This makes sure your new boards will last a long time.
Step 2: Measure and Cut the Boards
Now it’s time to measure your roofline. Use a tape measure to check how long each section is. Measure the area where the fascia board goes (along the edge of the roof) and where the soffit board will sit (under the overhang between the roof and wall).
Once you have your measurements, mark them on your new boards. Then, use a circular or hand saw to cut the boards to the right size. If you’re using PVC boards, use a fine-tooth blade so the cuts come out clean and smooth. Always cut slowly and carefully.
Not confident with cutting or handling the tools? Many experienced Roofers in Brighton can take over from here, making sure your fascia and soffit fit perfectly and last for years.
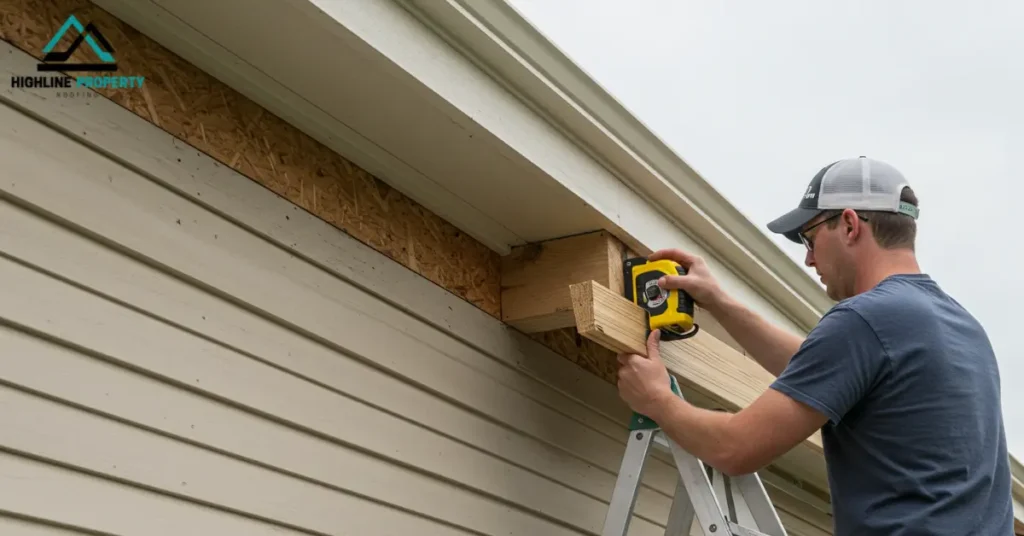
Step 3: Install the Fascia Board
Now that your fascia boards are ready, hold the first one up to the roof’s edge, right where the rafters end. Make sure it’s straight by using a level. If it tilts up or down, your gutters won’t work right.
Drill small holes (pilot holes) first; this helps to prevent the board from splitting. Then, screw the fascia board into the rafter ends. If you’re using PVC boards, use special screws with plastic caps that cover the heads, so it looks neat.
If your roof edge is long and you need to use more than one board, you’ll need to join fascia boards. To do this, cut the ends at an angle (about 45 degrees), fit them together tightly, and add a support strip or joint cover at the seam. This gives a clean and strong join.
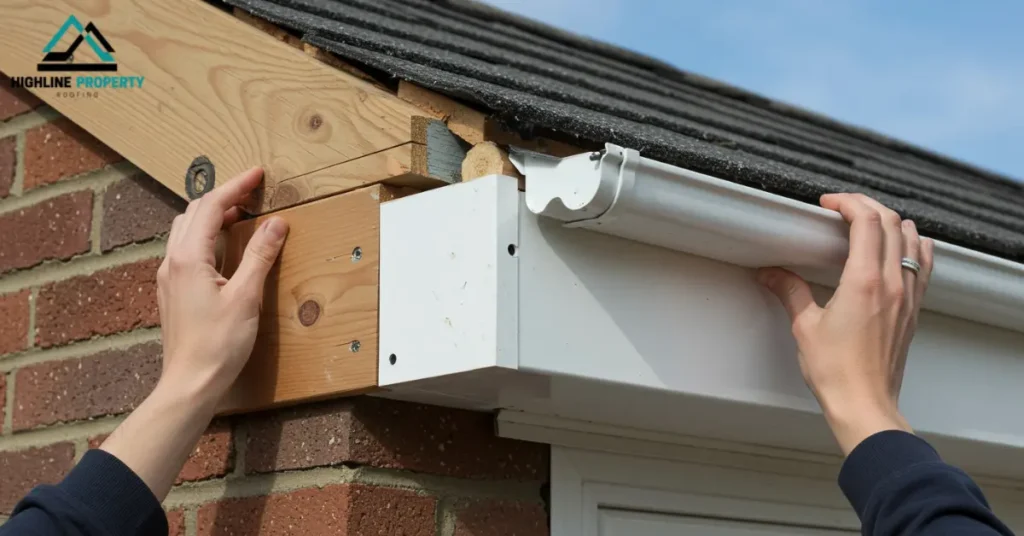
Step 4: Install the Soffit Boards
Once the fascia boards join, it’s time to add the soffit boards underneath. These cover the open space between the fascia and the wall.
Start by placing one end of the soffit against the house wall or under a support. Then, fix the other edge to the back side of the fascia board. Also, screw it in gently so it sits flat.
If your soffit is wide or you’re covering a large area, install some wooden battens underneath to support it and prevent sagging. This keeps it from bending over time.
Also, if you’re using solid soffit boards (with no holes), you can drill small holes or use special vents to let air flow into the attic. This helps your roof breathe and prevents moisture buildup.

Step 5: Inspect and Finalise
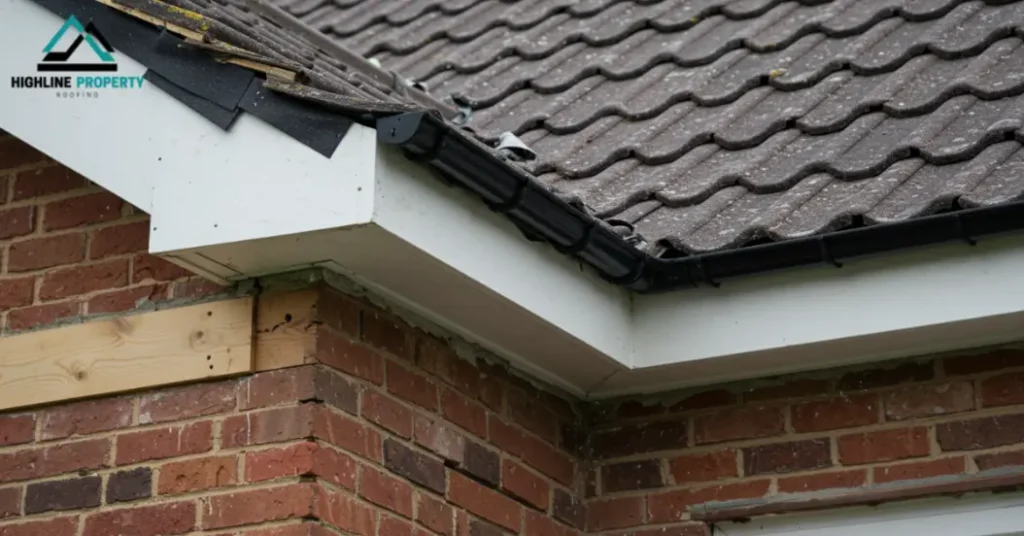
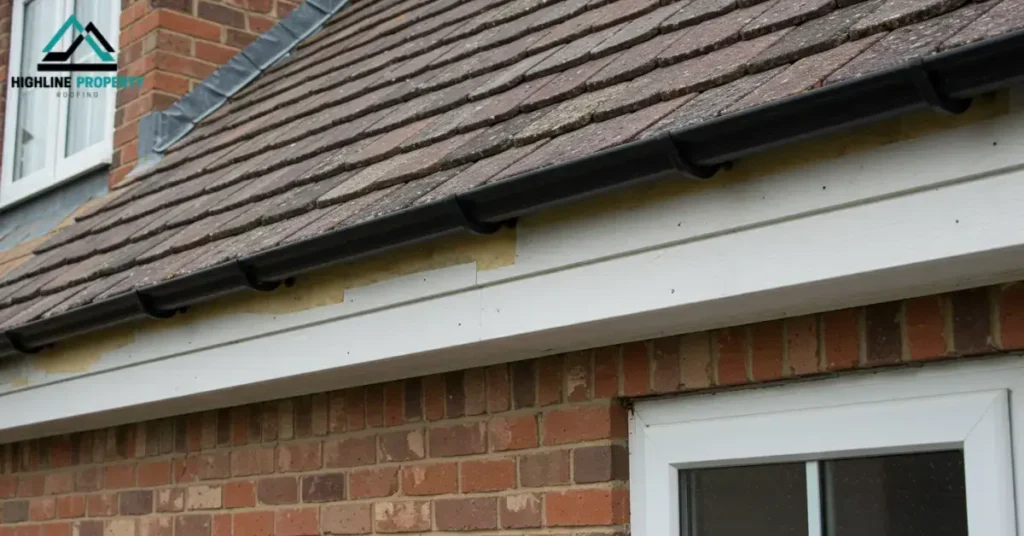
After you’ve installed all the fascia and soffit boards, do a final check. Look along the roof edges to make sure the boards are straight, neat, and tightly fixed. Check all the joins and seams; if there are any small gaps, use caulk or sealant to close them.
Proper sealing keeps rainwater, insects, and cold air out. And when the boards are installed neatly, they’ll give your home a polished, finished look that adds value and protection at the same time.
Special Instructions Based on Roof Type
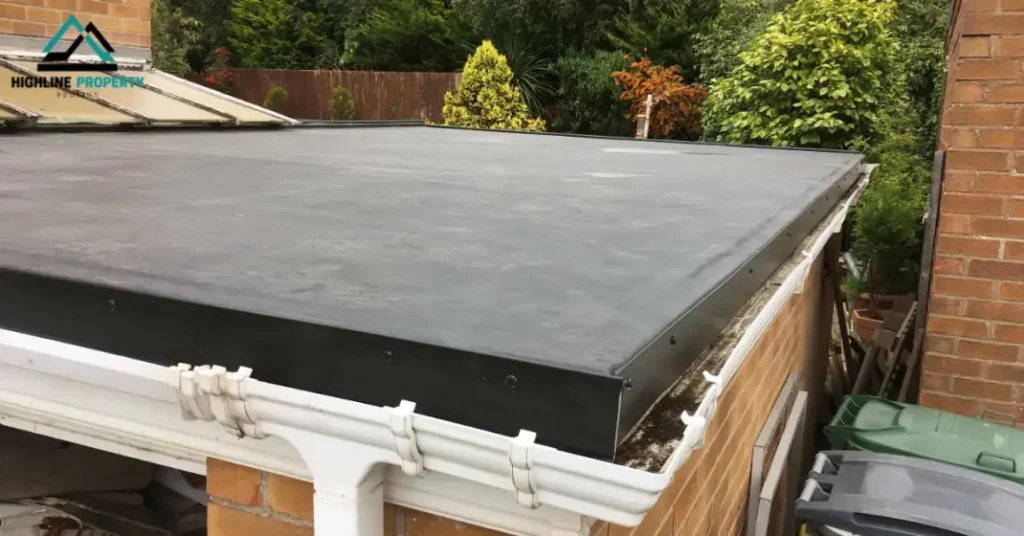
Installing Fascia Board on a Flat Roof
For a flat roof, the fascia is usually attached directly to the flat roof. You still cut and install the boards the same way, but make sure the top of the fascia aligns evenly with the flat roof edge. Seal all joins and gaps carefully to prevent water leaks.
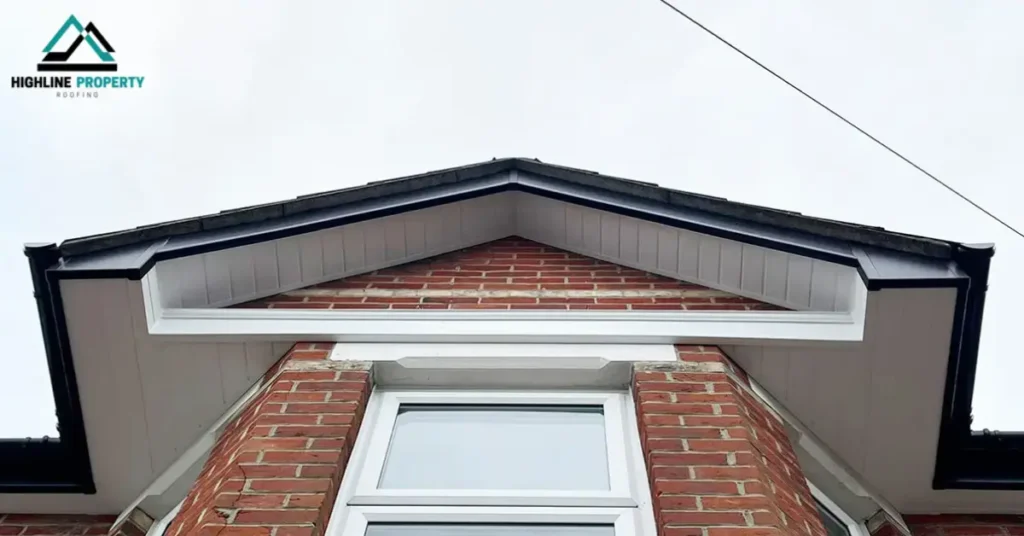
Installing Soffit and Fascia on a Gable Roof
On a gable roof, the fascia runs along the sloped sides as well. You’ll need to cut those fascia boards at an angle to match the roof slope. For the soffit, just continue the horizontal installation under the eaves. Pay extra attention to the top where the angled fascia boards meet and cut them neatly for a clean finish.
Safety Tips for Installing Fascia and Soffit Boards
Installing fascia board and soffit can be a DIY project, but safety should always come first. Here are a few important safety tips:
Always use a ladder tall enough to reach the roof safely. Ensure it is positioned on level ground and securely angled to avoid slipping.
Protect yourself by wearing gloves to avoid sharp edges on the boards, goggles to keep debris out of your eyes, and non-slip footwear to ensure a steady grip on the ladder.
Before you start, make sure all tools, like your saw and drill, are in good working condition and have sharp blades. This will help you work faster and reduce the chance of accidents.
Don’t attempt this project in bad weather like heavy rain, strong winds, or during a storm. Wet surfaces can be slippery, and working in windy conditions is risky.
If your roof is very steep or higher than what you can safely reach with a ladder, it’s best to call a pro who has the right equipment and experience to work at heights. Also, if at any point you feel uncomfortable or unsure about your ability to safely complete the installation, don’t hesitate to call a professional. For expert assistance, visit our fascia and soffit service, where we provide quality service to protect your home from potential damage.
Conclusion
Installing fascia boards and soffits might seem challenging at first, but once you follow the steps and understand your roof type, it becomes much easier. Whether you’re doing this on a flat roof, gable roof, or your main house, the method is mostly the same with just a few small changes. Now you know the tools and steps, you’re ready to take on the project and give your roof a clean, strong edge that lasts for years.
FAQs
How do I know what size fascia and soffit boards I need?
Measure the length of your roofline and the gap between the fascia and the wall. This will help you determine the appropriate board size. It’s always a good idea to add a little extra length to make sure of a good fit.
What materials are best for fascia and soffit boards?
Wood, PVC, or aluminium are popular materials for fascia and soffit boards. Wood is traditional, PVC is low-maintenance, and aluminium is durable and weather-resistant.
How long will fascia and soffit boards last?
With proper installation and maintenance, fascia and soffit boards can last for 20 years or more. Wood boards may require more care, while PVC and aluminium last longer and require less maintenance.
When should I hire a professional for fascia and soffit installation?
If your roof is too high, steep, or has structural damage, it’s better to hire a professional. Additionally, if you’re unsure about the installation process, getting expert help can guarantee safety and proper installation.