How To Repair Roof Felt From Inside: The Complete Guide

If you’ve noticed a leak from your roof after heavy rain, it might be due to a crack or hole in your roof felt. But fixing it from the outside isn’t possible when it’s raining or unsafe to go outside.
In this case, a quick repair from inside your loft can help. Although it is not a permanent fix, it can help stop the water and prevent further damage.
Here’s a step-by-step explanation of how to repair roof felt from inside using a felt patch. We’ve also covered the tools you need, other temporary options, and common mistakes to avoid.
Gather Tools And Materials For Felt Roof Repair
| Tools | Materials |
| Scissors or a knife | Felt patch (roofing felt) |
| Ladder (for loft access) | Roofing adhesive or felt glue |
| Cloth or rag (for cleaning) | Sealant (optional, for edges) |
| Flashlight | Plastic sheet (for temporary fix) |
| Work gloves | Bucket (to catch any leaks during repair) |
| Measuring tape |
How To Repair Roof Felt From Inside? A Step-by-Step Guide
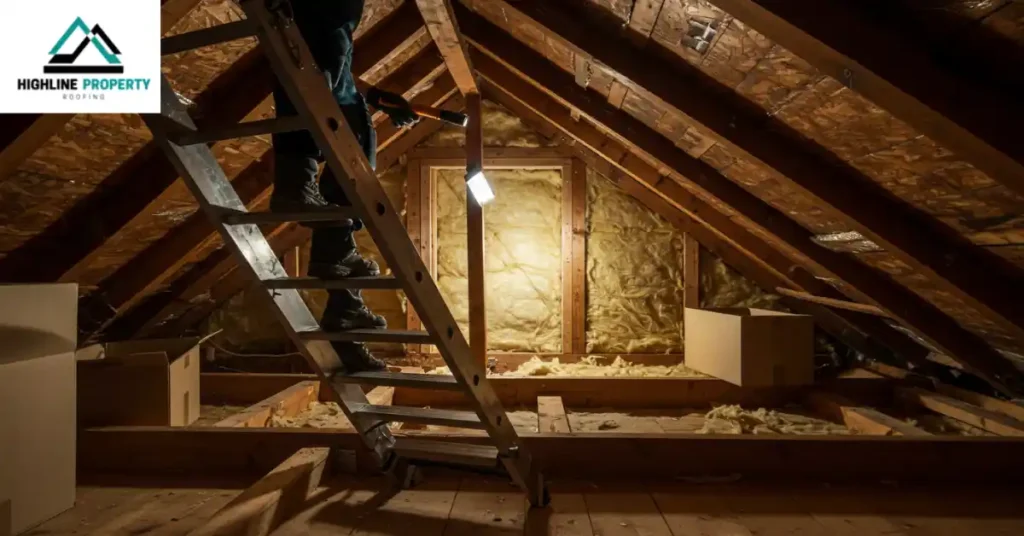
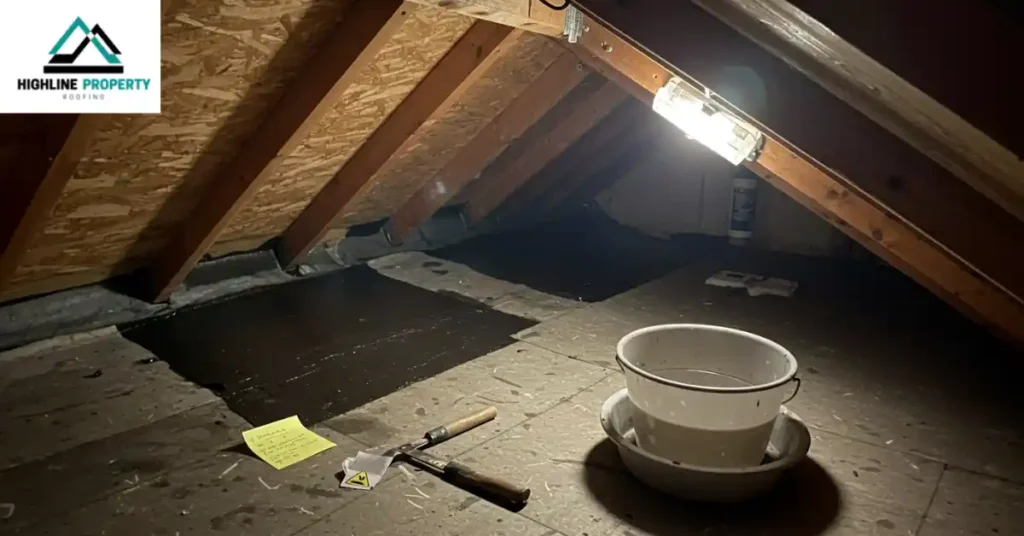
Step 1: Go Into the Loft or Attic
The first step is to go inside your loft or attic carefully. Wear gloves to protect your hands, and bring a torch so you can see clearly. Make sure to only walk on the wooden beams. Do not step between them because the ceiling below might not hold your weight and could break.
Step 2: Find the Damaged Area
Now look for a tear or hole in the black or grey felt layer under the roof tiles. If it has rained recently, you might see water dripping or a damp patch.
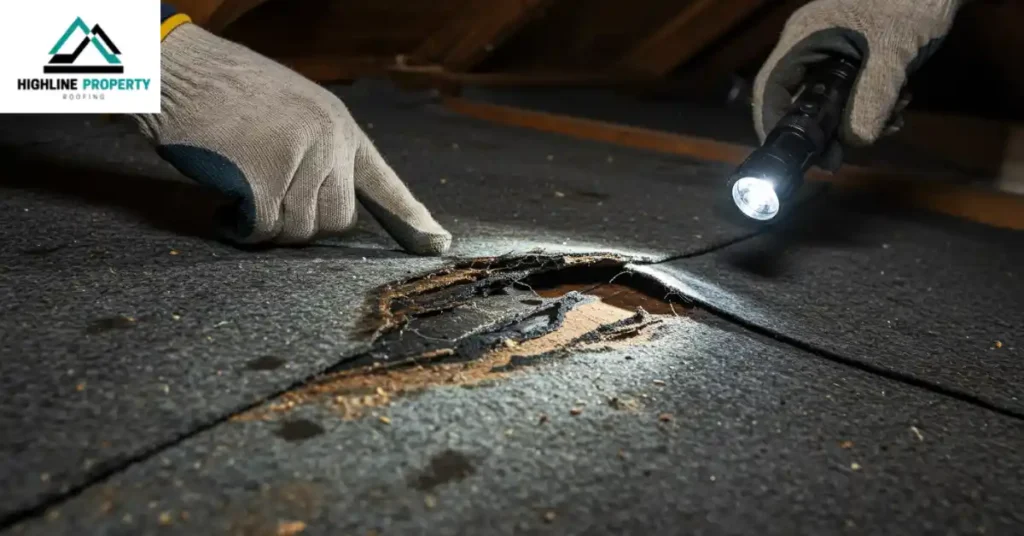
Also, look around to find if there are any wet spots. When you find the damaged area, remember its location or mark it with chalk or a small piece of tape.
Not comfortable handling the damage yourself? Highline Property Roofing provides felt roof repair services in Brighton and nearby areas to get the job done properly.
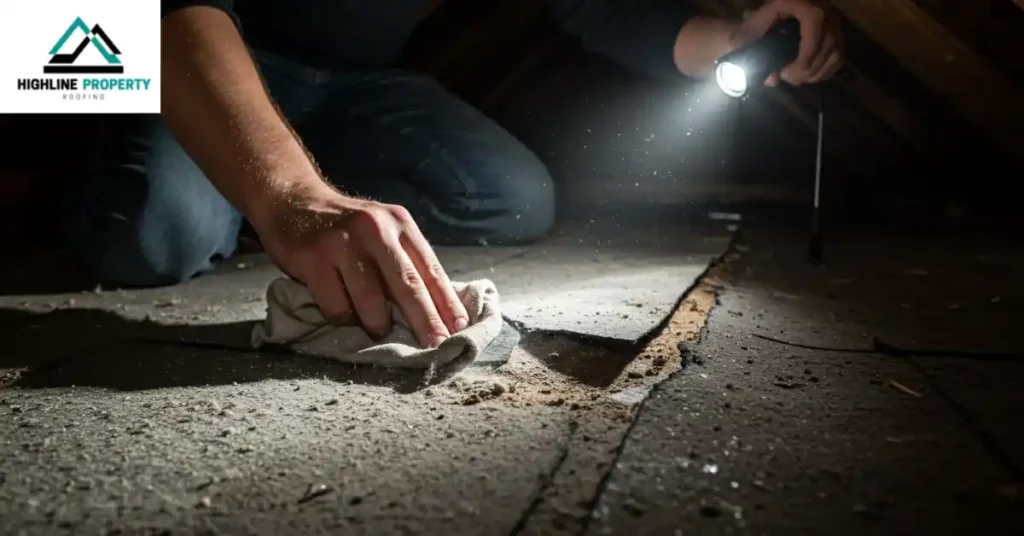
Step 3: Clean the Area
Before you start repairing roof felt, you need to clean the area. You can use a dry cloth or rag to wipe away any dust, dirt, or spider webs. If the felt is wet, try to let it dry first. You can also pat it gently with a dry cloth and wait a little while. The patch won’t stick properly if it’s very damp and could fall off later.
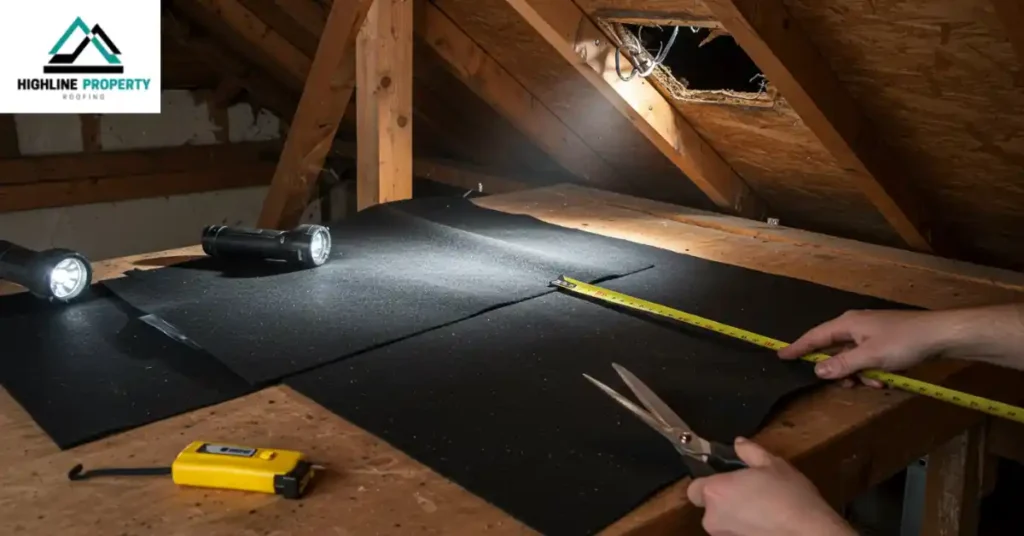
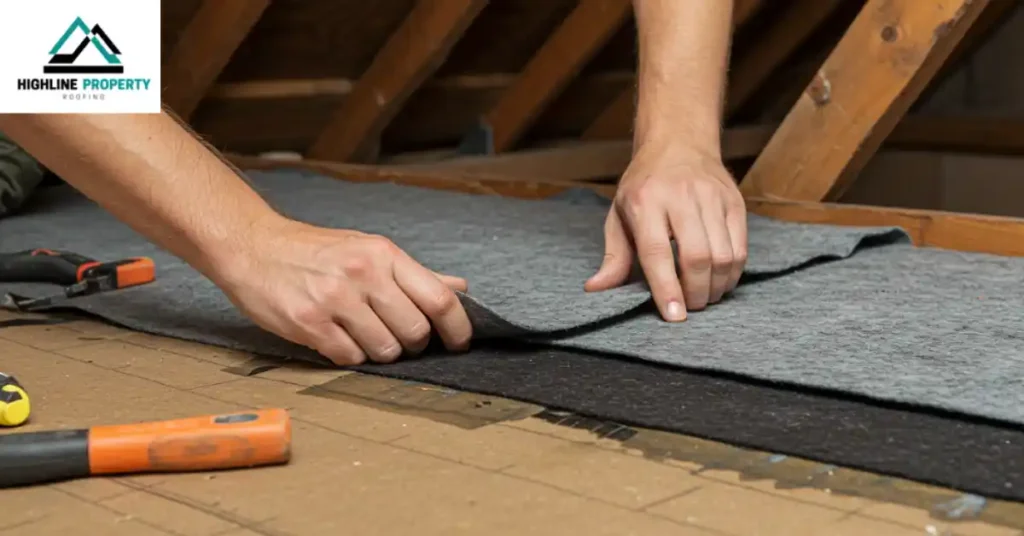
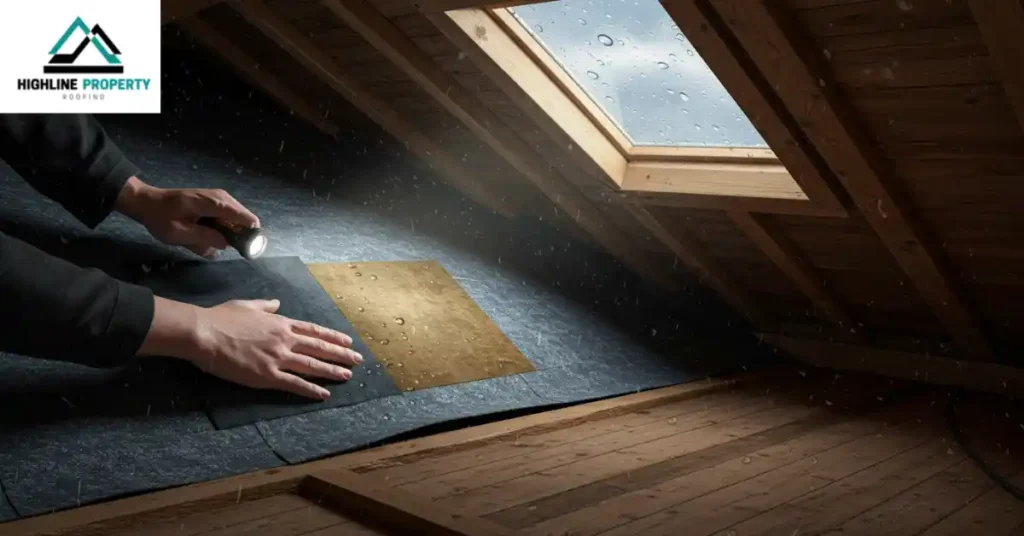
Step 4: Cut a Felt Patch
Next, get a piece of roofing felt. You can buy this at a DIY store or online. Cut it into a square or rectangle bigger than the hole. Make sure the patch is at least 2–3 inches bigger on all sides of the hole. For example, if the hole is 2 inches wide, cut the patch at least 6 inches wide. This gives it enough space to hold tightly and doesn’t peel up later.
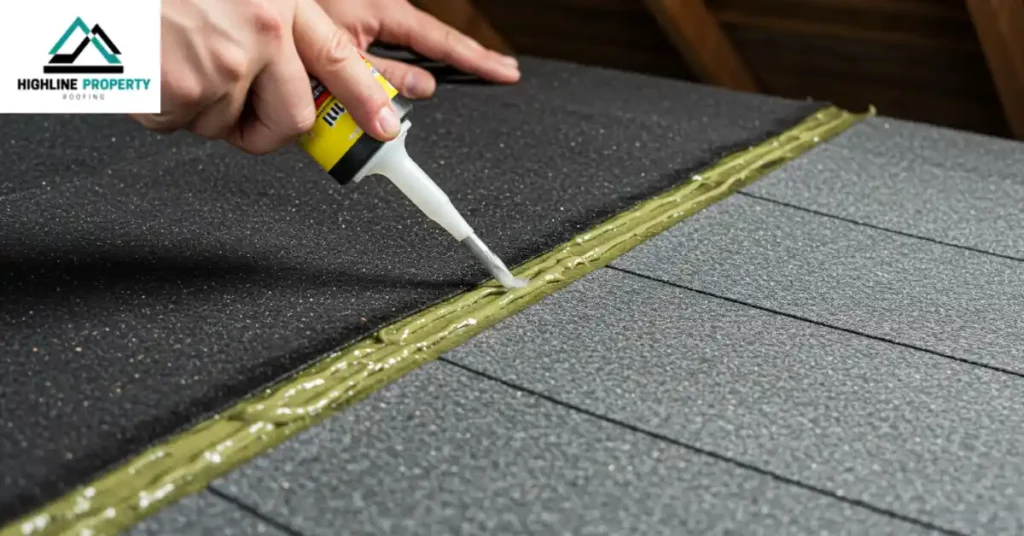
Step 5: Put Adhesive on the Area
Now, take some roofing felt adhesive or roof sealant. It usually comes in a tube or a tub-type box. Use a brush, spatula, or strong stick to spread the glue all around the hole. Cover the damaged area and some extra space around it. Make sure you use enough glue, but don’t make it too thick; otherwise, it won’t stick properly.
Step 6: Stick the Patch Onto the Felt
After that, take the patch of felt and gently press it over the hole. Start pressing from one side and slowly smooth it across to the other side. This will help you push out any air bubbles. Once it’s in place, press down all over the patch to make sure it sticks. You can use your hands, a cloth, or a small roller to press it firmly.
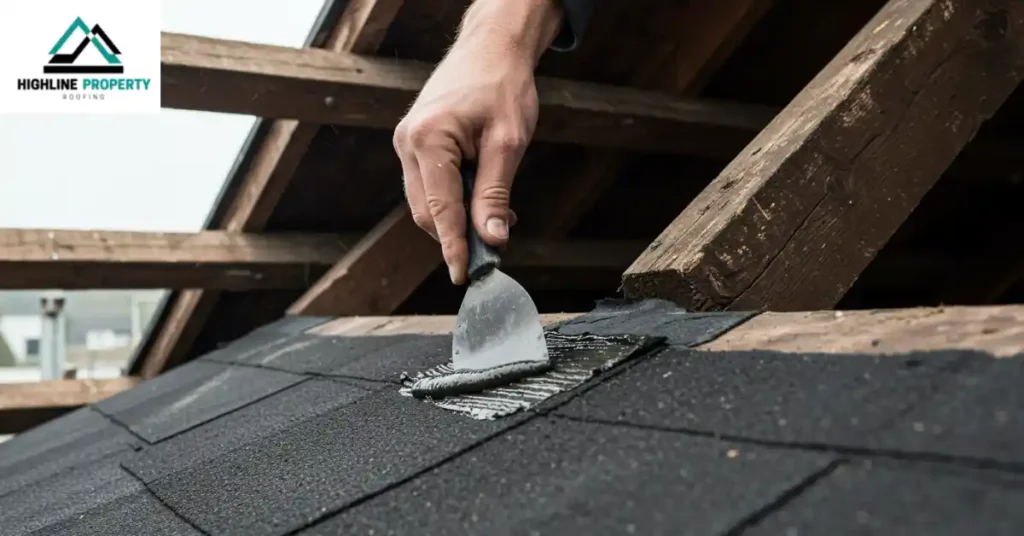
Step 7: Seal the Edges
Seal the edges to prevent water from leaking under the patch. For sealing, apply a small amount of the same adhesive or sealant around the sides of the patch. This makes the patch more waterproof and helps it last a long time.
Step 8: Let It Dry
After applying the patch, let it dry for several hours or follow the instructions on the glue or sealant you used. Don’t touch it or move it while it’s drying. If the weather is bad or rain starts, place a bucket or bowl under the area.
Step 9: Check the Patch
Once it’s dry, check the patch during the next rain or after a few days. If water is not leaking through, then the patch is working.
But remember, this is only a temporary fix. It will stop the leak for now, but you’ll still need to get the roof properly repaired from the outside as soon as you can.
Common Mistakes to Avoid When Fixing Roof Felt
- If you don’t clean the area first, the patch might not stick. Always wipe away dust or spider webs before starting.
- If the patch is too small, it can come off easily. Make sure it’s much bigger than the hole to cover it well.
- If you don’t press down the edges properly, water can still get in. Always seal the sides so the patch stays in place.
- If the felt is too wet, the glue won’t work. Try to dry it a bit or cover it with plastic until you can fix it.
- Fixing felt roof from inside is not a permanent solution. If the damage is large and you want a permanent fix, it’s best to call a professional roofing contractor. A roofer can replace the damaged felt from the outside and make sure your roof is safe and waterproof. While it may cost more, long-term protection is often worth it.
Conclusion
Repairing roof felt from inside is an easy way to stop small leaks, especially when it’s too risky to fix the roof from outside. Using a felt patch is a simple method if you follow each step carefully. Just remember, this kind of fix is usually temporary. For long-lasting results, it’s always a good idea to get the roof checked and repaired properly from the outside by a professional. Taking quick action can help to protect your home and prevent serious damage.
FAQs
1- How long will an inside roof felt repair last?
Repairs from inside are usually temporary and can last until you can fix the roof properly from outside.
2- Can I do this repair in the rain?
You can, but it’s better to let the area dry first. If it’s leaking badly, you can still apply roofing tape as an emergency fix.
3- Can I use roofing tape instead of a felt patch?
Roofing tape can work as a temporary fix, but a felt patch with adhesive is more reliable for stopping leaks inside.
4- Should I call a professional for roof felt repairs?
For permanent and safe repairs, especially on the roof exterior, it’s best to hire a professional roofer.